Cook's Country
Never Enough Citrus
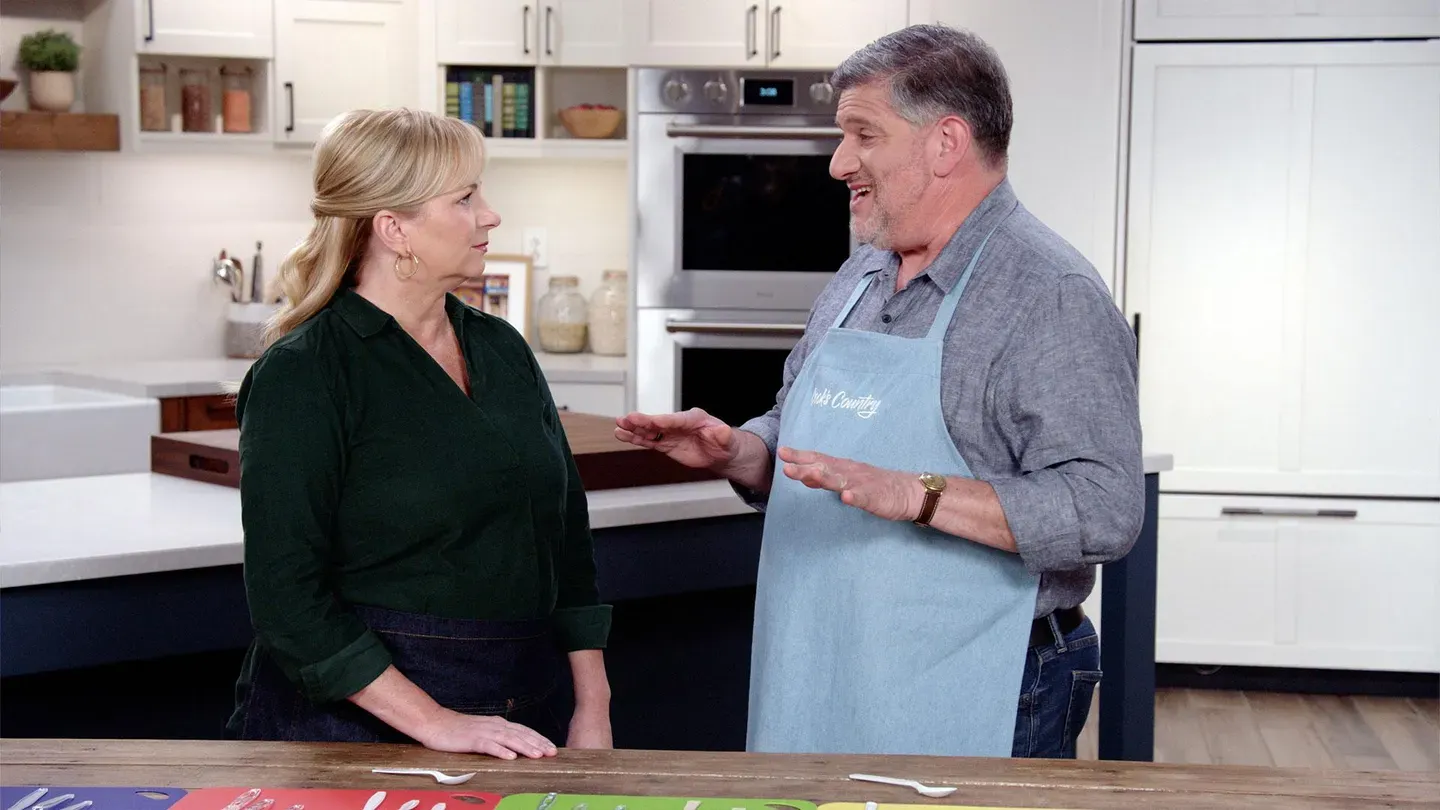
9/9/2023 | 25m 46sVideo has Closed Captions
Smoked Citrus Chicken, Really Good Key Lime Pie; the origins of Key Lime Pie.
Morgan Bolling makes host Julia Collin Davison Smoked Citrus Chicken, and Toni Tipton-Martin shares the origins of Key Lime Pie. Christie Morrison makes host Bridget Lancaster Really Good Key Lime Pie.
Problems playing video? | Closed Captioning Feedback
Problems playing video? | Closed Captioning Feedback
Cook's Country is presented by your local public television station.
Distributed nationally by American Public Television
Cook's Country
Never Enough Citrus
9/9/2023 | 25m 46sVideo has Closed Captions
Morgan Bolling makes host Julia Collin Davison Smoked Citrus Chicken, and Toni Tipton-Martin shares the origins of Key Lime Pie. Christie Morrison makes host Bridget Lancaster Really Good Key Lime Pie.
Problems playing video? | Closed Captioning Feedback
How to Watch Cook's Country
Cook's Country is available to stream on pbs.org and the free PBS App, available on iPhone, Apple TV, Android TV, Android smartphones, Amazon Fire TV, Amazon Fire Tablet, Roku, Samsung Smart TV, and Vizio.
Providing Support for PBS.org
Learn Moreabout PBS online sponsorship♪♪ -"Cook's Country" is about more than just getting dinner on the table.
We're also fascinated by the people and stories behind the dishes.
We go inside kitchens in every corner of the country to learn how real people cook, and we look back through time to see how history influences the way we eat today.
We bring that inspiration back to our test kitchen so we can share it with you.
This is "Cook's Country."
♪♪ Today on "Cook's Country," Morgan heads to the grill and makes Julia smoked citrus chicken.
I share the legend of Aunt Sally and the key lime pie, and Christie makes an outstanding version of key lime pie.
That's all right here on "Cook's Country."
♪♪ ♪♪ -Back in 1975, in the coastal town of Guasave, Mexico, a gentleman by the name of Juan Francisco Ochoa decided to stop selling shoes in the family shoe business and start selling his family's recipe for citrus-marinated grilled chicken.
And it was a huge success.
He turned the restaurant into a chain known as El Pollo Loco, or The Crazy Chicken.
And even today, you can find hundreds of these restaurants throughout Mexico and California.
And inspired by that recipe today, Morgan's gonna try to re-create it at home.
-So actually, El Pollo Loco, they call their chefs grill masters.
So I'm after the title grill master today.
-I like it.
-So to get there, I'm starting with a really flavorful marinade.
Here I have 1/4 cup of olive oil, a tablespoon of kosher salt.
-All right.
-And then I've got four garlic cloves.
We want some garlic here.
And on to the citrus.
So here I have 1 1/2 teaspoon of orange zest.
-Okay.
-So at a Pollo Loco, it's thought that they use pineapple juice and a few other actual juices.
But I wanted this to be something I could throw in the fridge for an hour or overnight.
And so I didn't want any juice that would actually make the chicken tough.
So I just went with zest here.
It gives a huge punch of flavor, some nice floralness.
This is a teaspoon of lemon zest.
And then I also have some spice.
So here I have 1 1/2 teaspoon of cumin, 3/4 teaspoon of cinnamon.
I have 1/2 teaspoon of pepper and 1/8 teaspoon of cayenne.
So just a little kick.
-All right.
-Just whisk them up.
And set this aside.
-All right.
-And this is a citrus and smoked chicken.
So here I have wood chips.
I have 1 cup.
And I'm just gonna fold this into a wood-chip packet.
I'm just gonna eyeball it, but you're going for something roughly 8 by 4 inches here.
Now I'm gonna cut two 2-inch slits.
-So easy.
-So easy.
So now the chicken.
I have one 4 1/2-pound chicken here, and I'm gonna break it down for about 3 pounds of pieces.
-Okay.
-I like to start with the legs.
So I'll do one little slash here.
And then I actually flip the chicken over, bend it back, and I put my hand here, where the oyster is, on the back of it, and then I'll do a little cut here.
-Ah!
So you get the oyster attached to the leg.
-Yeah.
So the oyster, chefs know, is one of the best parts, so you don't want to lose it.
And then I'll do the same on this side.
So I'll do a little slash here.
You can just cut right where that fat line is so you don't actually end up cutting through any meat.
And then again, you just pop it back.
And then again, I'll go straight line back, and then I'll use my knife, and I'll put it actually against the backbone to avoid hitting any of the oyster.
And I save that delicious meat.
And then I like to take the wings next, so I'll actually just use the weight of the chicken to sort of help guide me here.
-Mm-hmm.
Do the wings get grilled alongside the rest of the chicken?
-So in this recipe, they don't.
But I'm surely not gonna throw away those wings.
I'm gonna save them.
-Mm-hmm.
-And then I like to remove the backbone.
For this, I just use a chef's knife.
I like to get in there with the back of the knife.
I'm gonna save the backbone.
So then I'm gonna cut through the breastbone.
And again, I'm just using my chef's knife here 'cause it is a little more work to get through.
-Mm-hmm.
-And then I'm gonna cut out this blade bone.
Use the back of the knife again and put some pressure on it.
Okay.
So then I'm gonna actually also cut these breasts in half.
So let's see.
Let's do that.
And then same with my leg and thigh.
So I like to flip it over and look for where this fat line runs.
And sometimes you have to pull back the skin a little bit.
You just cut right along there.
If you need to, you can bend it just a little bit.
And then you honestly don't even have to cut through bone if you do it -- if you hit the right spot.
It's okay if you do cut a little bit of bone.
I'm gonna make some slashes in the chicken.
When I marinate it, the salt's gonna actually be making it juicier.
But I do want that citrus and garlic and warm spice to get in the meat.
I'm gonna do two slashes in each piece, about 1/2 inch deep.
Okay.
So I'm just gonna add these in here and give it a nice toss.
I just like using my hands.
I'm already covered in chicken, so why not?
So I just want to make sure everything gets nice and coated.
And then will you cover it for me, since my hands are a little chickeny?
-Yep.
-Since I don't actually have citrus juice in there, this can actually go up to 24 hours and it and it won't get mealy or anything.
It'll stay nice and juicy.
It starts getting a little salty after 24 hours.
-Okay.
-But yeah.
You can do this anywhere 1 to 24.
I want a lot of flavor here, so we're going 24 hours.
-You wash your hands.
I'll put this in the fridge.
-Okay.
Julia.
It's a beautiful day for grilling.
-It is.
-So let's get this grill set up.
-Okay.
-I have my grill.
And I'm gonna put a wood-chip packet in here.
-So the grill's not hot at this point.
-No, no, no.
Very cold.
I can stick my hands wherever I want.
Not gonna burn myself.
And I am putting the wood-chip packet right here on the primary burner.
-Okay.
-So now I'm gonna turn it on.
The flame's running right there.
I want that to get as much heat as it possibly can.
-Gotcha.
-I'm gonna let this preheat for 15 minutes.
-So all burners are on at this point.
-All the burners are on.
All are on high.
So I want it to preheat for a good 15 minutes.
That'll get the wood-chip packet nice and smoky.
It'll get my grill nice and hot, and then we'll be ready to cook our chicken.
-All right.
-It smells nice and smoky.
-It does!
-I know.
And you can see we got some smoke coming.
-Oh, yeah.
-We're going.
We're rolling.
So I'm gonna turn these two burners off.
I'm gonna keep this one on high, and then I'm gonna clean and oil my grate.
Of course, it's important to start with a nice clean grill.
And...time to add the chicken.
There's a little geometry that goes on here.
I want to put all the thighs and drumsticks closer to the flame.
-That makes sense.
-Yeah.
They can handle a little bit more heat than the breast.
And then the breast pieces, I'm gonna tuck back here, over as far away from the heat as I can.
These, I only want to get to 160 degrees, so I want to keep them on this nice, gentle part of the grill.
-I notice you're keeping the thin side of the breast all the way right.
-Yeah.
Yeah, yeah.
This is, like, the most prone to overcooking.
I want that to be, like, as protected as it can.
-Smart.
And skin side up.
-Yes.
Right now, I'm really just gonna let that skin render a little bit.
Later, I'm gonna worry about char.
But right now, I'm just trying to get this smoke happening, get the chicken nice and cooked through.
I'm gonna cover this.
I'm gonna watch the grill's heat.
I want it between 350 and 400 degrees.
So I am gonna keep this burner on high.
But if I need to, I can adjust it or I can even turn on a second burner.
350 to 400.
I'm also gonna be cooking it until the chicken registers 160 for the breasts and 175 for the thighs.
-Got it.
-So that'll take about 25 minutes.
I want to start checking it at 22 just to see.
I don't want to overcook anything.
-Okeydoke.
-I feel like we're in California.
We got the smoky vibes.
I can, like, smell the citrus and the spice.
Okay.
So let's check it out.
Okay.
Let's see this guy.
Okay.
So this one's not quite looking like it's there yet, but that's fine.
I want to check them and see where they're all at.
I want to take them off as they're ready.
-Right.
-Okay.
So that one's perfect.
That one's 162.
So I'm gonna pull it off and put it on this plate.
-Mm-hmm.
-Let me check the rest of them.
And then for any that aren't ready, I'm just gonna let them keep going until they come to temp.
-Makes sense.
-Okay.
So we've taken all the chicken off.
While it's actually all safe to eat, it's not beautiful.
So I'm actually gonna char it.
So this time I'm gonna take it and I'm gonna put it all skin-side down.
So I'm gonna try to get that skin nice and charred.
-And you're going right over the grill packet.
You're not worried about that?
-Not worried about that at all.
I'm definitely trying to concentrate this over the primary burner, so over the high heat.
I want to get some nice color here.
I'm just gonna keep this open this whole time.
I can keep a good eye on it, make sure nothing's getting too dark.
I can move them around as I want.
So it's gonna take about three minutes for them to get some nice color.
I want them to look like grilled and smoked chicken.
-Makes sense.
Morgan, that chicken is stunning.
-Oh, Julia, it's like -- -Look at that!
-I know.
It's, like, burnished.
It's like a little bit -- -Yes!
-I kind of love that with this sort of a recipe, you get a little bit of that nice amber color from the smoke, but you also get a little bit of this, like, nice, caramelly mahogany.
-Mahogany.
Oh, it's gorgeous.
-Okay.
I'm gonna turn this off.
And let's see.
We tent this with foil.
It'll take about 10 minutes to rest, and then time for us to eat.
-All right.
-The chicken's been resting 10 minutes.
-Mm-hmm.
It smells so good.
-It does smell so good.
But I want to make it look just as good.
So, honestly, this is really mostly about aesthetics.
I mean, I do like having a little zhuzh of orange juice or lemon juice at the end, but it's also just like I want people to know what they're eating.
So I'm just gonna decorate this all over.
It is very clear that this is citrus chicken.
-Yeah.
Well, I do like it when you bring something to the table, people immediately know what to expect.
-Mm-hmm.
We're giving them some clues.
-And I expect white and dark meat.
Just kidding.
-Okay.
Well, hey, I got you.
-I'm gonna grab some citrus pieces.
-Yeah.
I'm gonna do the same.
I'm gonna match you over here.
-So the citrus -- Do you put it on the chicken?
'Cause that's what I'm tempted to do.
-I think you should do that.
Yeah.
-Yeah.
-I mean -- Yeah.
Look at that.
A little extra.
I mean, it's gonna be plenty moist already, but get a little extra citrus in there.
-I go right for the drumstick.
I'm like a little kid.
Mmm!
-Mm-hmm.
It's really well seasoned.
You get some of that spice.
You get some of that citrus.
I also like that the skin, it's not crispy, but it's rendered.
It's really nice, and it's, like, not flabby at all.
-It almost has that sticky quality of well-rendered skin that's been marinated.
-I know.
It makes you do a little... -And I taste the cinnamon.
It's just ever so faint.
It's a backbone.
But the cumin, the cinnamon, the garlic, and then the citrus.
-I might try my breast piece.
Let's make sure that white meat is nice and juicy.
-Same.
Mmm!
-Mm-hmm.
Yeah.
Letting it sit in that salt overnight, that helps it keep this really nice juiciness.
-Morgan, thank you for showing me how to make this.
-Of course.
Thank you for grilling with me.
-My pleasure.
If you want to make this smoky, citrusy chicken, start by marinating the chicken with some citrus zest, salt, and a few spices.
Add wood chips to the grill for smoke and serve with citrus wedges.
From "Cook's Country," our nod to El Pollo Loco -- smoked citrus chicken.
This is amazing.
♪♪ -Historians and cookbook authors have long held two theories about the creation of key lime pie.
One story says the tangy dessert was created by the manufacturer of canned milk.
Another possibility is that key lime pie is a riff on icebox lemon pie.
Today, a 19th-century cook known as Aunt Sally is celebrated as the inventor of key lime pie.
I wrote about her after stumbling upon a legend at a Key West bed-and-breakfast called Amsterdam's Curry Mansion Inn.
Aunt Sally's real name was Sarah Jane Lowe, and she worked as the cook in the home of a ship provisioner named William Curry.
Among other things, Curry brought condensed milk to the Keys, and some say that Aunt Sally got the inspiration for her recipe from local fishermen.
In the late 1800s, fishermen in southern Florida would put together meals on their skiffs by mixing stale Cuban bread with easy-to-store condensed milk and wild turtle or bird eggs.
They squeezed juice from local key limes so that the acidity would both cook the eggs and add flavor.
The story goes Aunt Sally turned their creation into a tangy pie.
By the 20th century, the pie's popularity spread beyond the Florida Keys.
And today at "Cook's Country," our version of the classic dessert features a tangy custard base and a pillowy meringue topping.
♪♪ -Way back in the 1960s, a Florida state representative named Bernie Papy Jr. floated a fine to be imposed upon anyone that would sell a key lime pie that didn't use key limes.
Now, there's no law on the books today, thankfully, but it does beg the question -- Do you have to use key limes to make a key lime pie?
Well, let's ask Christie, because she is here with all the answers.
-I hope s-- [ Laughs ] -I hope.
-I hope so too.
But actually, the lime juice is not the only controversy with this pie.
-No?
-No.
There's also debates that rage over what kind of pie crust to make... -Uh-oh.
-...and do you meringue or not meringue?
So with no clear mandate, we decided that we would develop a recipe that had a soft but set filling... -Mm-hmm.
-....that really kind of straddled the fine line between tart and sweet.
-Okay.
-So to start with the crust, we love a graham cracker crust.
-Yes.
-And I have 6 ounces of graham crackers that I've broken into 1-inch pieces.
It's about 11 crackers.
We're gonna start there.
We love the sweet flavor and also that kind of crystalline texture you get from graham crackers.
-It's almost like short crust.
-Yes.
-Yes.
-But we're gonna up the buttery, salty ante by adding some pretzels.
-Hmm.
-I've got 2 ounces of mini pretzel twists.
It's about 35 pretzels if you want to count them.
-I do, yes.
-[ Laughs ] We're gonna add that to the mix.
And that extra bit of salt is really going to not only balance the sweetness, but it's going to make that lime flavor even more pronounced.
-Mmm!
Excited about that.
-I also have 1/4 cup of packed light brown sugar.
-Okay.
-And 1/4 teaspoon of salt.
-Gotcha.
-We're going to process this for about 30 seconds, until it's very finely ground.
-Okay.
-That looks pretty good.
See how it's all nicely broken up?
We've got a fine texture.
So now we'll add the butter.
This is 8 tablespoons of melted unsalted butter.
Now we're just gonna pulse this about eight times, just to make sure that it's all incorporated, everything looks nice and sandy.
Now I have a 9-inch pie plate.
And you really need to use a sturdy pie plate.
This is not a place to use aluminum pie plates, because this is gonna be a substantial custard inside the crust, so it needs support and depth.
Now, you know our favorite way to press a graham cracker crust into a pie plate is to use a dry measuring cup.
I kind of scooch and try to get a nice, even bottom.
This is gonna be nice and thick all the way around.
-Nice.
-So once I get the bottom, I kind of start to go up the edge, and I usually use my finger to know where the top of the pie crust is.
-A little finger blockade there.
-[ Laughing ] Yes.
Now, I am going to put this on a rimmed baking sheet... -Okay.
-...to put it in the oven.
And I have the oven set to 350 degrees with the rack in the middle position.
And we'll just bake this until the crust is set and it's starting to get nice and fragrant -- about 17 minutes.
Bridget, as you can see, we have our lovely baked pie crust.
It smells great.
So that's all ready for us.
I just have it on a wire rack.
-Okay.
-It can cool a little bit.
It doesn't have to be hot when we add the custard to it, so it's just fine hanging out here.
-Great.
-Most key lime pie custards start with sweetened condensed milk and egg yolks.
-Right.
-That's where we're gonna start.
-Okay.
-So I have 1 1/2 cups of sweetened condensed milk, and that will require opening two cans.
-I'll pay that price.
-Add it to your coffee.
-That's right.
Yes.
Exactly.
-So we'll add those four large egg yolks.
And they're obviously going to add some richness to the custard, but we're also gonna add 6 tablespoons of heavy cream just to add a little extra richness, make sure that it's nice and silky.
So now we need to add some lime juice.
You could use key limes.
We have some key limes here.
They definitely add a more floral, nuanced flavor, although we did find it was a little astringent in the custard and you need three times as many key limes to get this same amount of liquid.
So we're using six Persian limes -- 3/4 cup of juice.
-Just regular limes.
Love it.
-Mm-hmm.
And then we are adding 1/8 teaspoon of salt.
So just whisk this together until everything's incorporated.
And that's it.
Just making sure those egg yolks are broken and everything's nice and smooth.
-Okay.
-So I'm just going right into my pie crust.
I left the pie on the baking sheet, and we'll use that to go into the oven, too.
-Fantastic.
-Now we'll go back into our 350-degree oven, and we'll bake this until the outer edge of the filling is starting to set but the center is still a little bit jiggly when we wiggle it -- about 30 minutes.
-Okay.
-H-Ho, oh!
This is what we're looking for.
See?
You can see that it's starting to set around the edges.
-Yeah.
-But if we give it a little jiggle, it's still loose in the center.
That just means that it's not gonna overbake as it continues to carry-over cook.
-Okay.
Yeah.
Makes sense.
-I will transfer the pie plate directly to a wire rack and let it cool to room temperature, about an hour, and then I'll transfer it to the refrigerator, and we want to chill it for at least four hours.
If you want to do it ahead of time, you can chill it for up to 24 hours.
But you'd want to put some greased plastic over the top of it so you don't get a skin.
-No pudding skin.
-No pudding skin.
-Okay.
-Bridget, a meringue topping isn't necessarily traditional, but it's going to give us some really nice contrasting texture.
It makes a beautiful, stunning topping for this pie.
And also, it's gonna use up some of the egg whites that we have left over from separating the eggs.
So I'm gonna put my two egg whites into my stand mixer along with 1/4 teaspoon of salt and then 1/4 teaspoon of cream of tartar.
So we will get this started.
I'm gonna whip this on medium-high speed until we just get soft peaks.
It'll take two to four minutes.
-Okay.
-You can see how it's starting to hold the shape of the whisk.
-Yeah.
It leaves a little trail.
-Right.
That's when I like to check it.
You can see that we certainly don't have stiff peaks, but we're getting some soft peaks.
There's still a little bit of movement in there.
We're gonna do some more mixing in a little bit.
-Okay.
-So we'll let that sit.
-All right.
-Now we're moving over to the stovetop.
-Fantastic.
-I have 1/2 cup of granulated sugar.
Adding to my saucepan with 1/4 cup of water.
-Okay.
-I'm gonna turn my stove to medium high.
And I'm not going to stir this.
The sugar is gonna melt.
The water is helping it.
And we're just gonna let that happen.
It's gonna come up to a boil, and then we just need to let it cook.
-Yes.
-So we're boiling now.
We want to make sure that we get this to the right temperature so that our meringue will have the right texture.
-Okay.
-So we're gonna cook this to 240 degrees, and that's gonna ensure that we have a nice stiff meringue.
Ah!
240.
-All right.
-Perfect.
So I'm gonna turn off my heat.
And would you mind turning this back on to medium?
-Medium.
All right.
You got it.
How's that?
-Perfect.
So while the mixer is running, I'm going to very carefully pour this hot syrup into the mixer.
But I want to try to pour it so that it's between the edge of the bowl and the whisk.
-Right.
-So very careful.
And then once we get the sugar syrup in, we're going to add a tablespoon of vanilla extract.
-All right.
-And now we'll kick it back up to medium high, and we'll let this go until we get shiny, stiff peaks.
That'll take about two minutes.
-All right.
-Oh, boy.
-Mmm!
-Look -- Okay.
-Mmm!
-That's a stiff peak.
-That's a stiff, shiny peak.
-So we're just gonna let this hang out while I go get the pie out of the refrigerator... -Sounds great.
-...where it's been chilling.
Bridget, we're all set and ready to spread the meringue.
-Mm-hmm.
-Now, you could use whipped cream if you didn't want to do this, but it's not gonna be this stable, and it's not gonna be this pretty.
So I want to leave about an inch border.
I'm just gonna drop the meringue in the center.
Then I'll spread it around.
But I'll just build a nice little meringue tower.
Now, I'm using a spoon.
You could use a spatula if you wanted to instead, but I just feel like I have a little more control with the spoon.
It's gonna look so pretty and wispy if we have lots of pretty curlicues.
I think that's good.
-I think it looks heavenly.
-Now, the final step -- I mean, it looks so pretty as it is, but we had all those limes that we juiced.
I zested two of the limes before I juiced them.
So I have 2 teaspoons of zest here, and I'm just gonna sprinkle it over my pie.
-Oh.
No doubt that this is a lime pie in there.
-Right.
-Right.
-And so we've got sweet-tart lime underneath and a little bit of sweet-tart lime on top.
All right.
So I'm getting a nice, warm knife so we'll cut through that cleanly.
I hate to cut into this.
Is it okay?
Are you ready?
-If you do not cut into that, I am coming for you.
-[ Laughs ] -[ Laughs ] That is a substantial crust.
-It is a substantial crust.
Now I'm gonna dip in between my slices, clean it off, and I'm gonna make a big slice, a big wedge.
-Mm-hmm.
That's for me.
Oh, yeah.
[ Gasps ] Hello.
Oh, my goodness gracious.
[ Exhales deeply ] -It's a little purty.
-Uh, yes.
-[ Laughs ] -It's gorgeous.
All right.
Going for that little... little piece there.
-It's making my -- my -- [ Laughs ] You know?
-It's the happy glands.
-The happy glands.
-Oh, my gosh.
That is tart and sweet and balanced.
The meringue... -It's not too sweet.
-Well, you built that pie from the bottom up so that the meringue would not be too sweet.
You've got the pretzels in the crust.
-Mm-hmm.
-It gives that substantial, malty saltiness.
And then the curd itself is beautifully tart.
-There's a lot of crust there.
Not too much, but it's enough to really not just be, you know, a shell for the pie but an active participant in the flavors.
-Christie, this is pie perfection.
-Thanks, Bridget.
-Well, to make this beautiful key lime pie, you want to use graham crackers and pretzels to make a substantial crust.
Add heavy cream for a silky, smooth filling and beat hot sugar syrup into egg whites for a tall, stable meringue.
And the best part -- You can use any fresh lime juice that you want, key lime or otherwise.
So from "Cook's Country," really good key lime pie.
You can get this recipe and all the recipes from this season along with product reviews and select episodes.
Those are all on our website, CooksCountry.com/tv.
-Let us help with dinner tonight.
Visit our website anytime for fail-proof recipes, full episodes, ingredient advice, and equipment reviews.
CooksCountry.com/tv.
"The Complete Cook's Country TV Show Cookbook" includes every recipe, tasting, and testing from all 16 TV seasons.
With over 600 recipes, it's our most comprehensive collection of "Cook's Country" TV recipes ever.
The cost is $24.99, $15 off the cover price of $40.
To order, scan the QR code on your screen or order online at CooksCountry.com/tv.
♪♪ ♪♪ ♪♪ ♪♪ ♪♪ ♪♪


Support for PBS provided by:
Cook's Country is presented by your local public television station.
Distributed nationally by American Public Television